Showing posts with label Felting. Show all posts

Sunday, June 6, 2010

More Applique Quilt Patterns to Come

Here are the latest photos of one of my most recent applique quilt patterns. Both machine applique and felt applique techniques were used to make this handmade quilt.

My daughter, husband, and I were out on a picnic one day, sitting on a handmade quilt given to us from Josh's Grandma. It got me thinking, and in the sunshine, with fine food and family, an idea came to me. What if I made a literal picnic quilt. From there I designed and created this fun little masterpiece, full of bright colors and sweetness.


Josh made these matching ceramic dishes and I made matching cherry print napkins to go along with this handmade quilt.  You can buy the whole set, along with a vintage picnic basket at The Artists' House Etsy Shop.  If you rather not purchase the entire set, the quilt is also for sale on it's own.


I'm currently working on the pattern for this handmade quilt.  Soon it will be available in my Etsy shop.


Yummy, don't you think?

Wednesday, March 3, 2010

And Today I'm Going to Sew - More Felting Inspirations

Remember a while back, I wrote about felting?  And then I made that super cute dress for my little girl, from an old, loved sweater of mine?  Well the Mommy side of my life got crazy right after that.  Since then, my baby girl Monet has cut multiple teeth, and has been sick twice.  You can read about our sleepless nights here if you want.  The good news is that Monet is feeling better and with that comes mornings filled with energy and ambition, before I even pour myself a cup of coffee.

This morning I woke up at 5 a.m. and said to my husband, "I'm going to sew today".  Now in all reality, I don't know if this will be possible.  The list of things I need to do is long.  I have to drop Monet off at the sitters, go to work, go get Monet from the sitters, run by Piper's Quilt Shop to drop off the Charley Harper Quilt and get my quilt pattern approved (I know, how exciting, it will be available soon), and then I need to get home and put Monet down for her nap.  And this is where the fate of my sewing ambition is decided.  Will Monet take a nap in her crib?  Or will I need to take her out in the stroller because she refuses to nap inside.  Well, lets just say that I'm feeling lucky today, and my sewing list is an ambitions one...


Project #1:  I want to make a pillow out of some cashmere I felted.  See that little moth hole, I plan to cover it up with a beautiful applique something or other. 


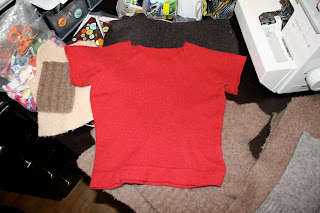
Project #2:  This sweater felted up so beautifully.  Before washing it, I cut off the neck and sleeves.  I'll need to figure out a way to clean those areas up.  Again, I hope to do some applique on this beauty, and then it will be ready for wearing.  I can just picture it on a little girl with dark hair and eyes.  I could maybe even cut down the middle and make a cardigan.  Hmm, that could be interesting.  


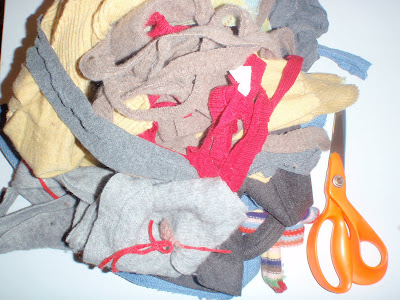
Project #3:  These are some sleeves I cut off a sweater.  I thought I could make gloves or babylegs out of them.  What do you think?  


Project #4:  I'm very excited about this project, and a little scared at the same time.  I want to use some of the felt that felted up pretty thick and make a coin purse out of it.  I've never done this before and I'm not even sure I know how.  We'll see how it turns out.


Project #5: Try Betz White's Shibori Felting tutorial. You just must check this out. The above image is from artist Jeung-Hwa Park. You can buy her work at Contemporary Craft.  Isn't it beautiful!

I hope that your day, and my day, allows us an opportunity to do that one thing we always hope to do and rarely have time for.  Would you please share with me what that "thing" is in your world?  

Happy day! 

Saturday, February 13, 2010

Felted Wool Dress


Last week when I was felting sweaters, I accidently threw one into the load that was mostly made of wool, but was also part synthetic. I have had this sweater since high school and while it no longer fit well, I have always hung onto it because of the cute detail on the front. The sweater shrunk up some, but otherwise looked the same. In examining the sweater I decided to cut off the sides of the sweater along with the sleeves in hopes of turning it into a dress for a young girl. After cutting off the sides of the sweater, I tucked the fabric under around the arm holes and then sewed down the sides of the sweater to make the dress. It really was that simple. And the end result were quite charming.


Wednesday, February 10, 2010

Inspired By Moths - How to Felt Sweaters


One cold morning in November, I arrived to school in a zombie like state, unaware that I had holes all over the sweater I was wearing. At the time, I was the mother of a newborn, and so I had no idea whatsoever that my sweater bore a keen resemblance to swiss cheese. Fortunately my students were pretty forgiving because they had become accustomed to the reality that most mornings I was a tired, sleep-deprived mess. At first I was completely baffled as to how the holes could have gotten there. Yes, I was tired all the time, as we have already established, but holes in my sweater, how did that happen? After a few bewildering moments my morning coffee kicked in. It hit me. I must have moths. The rest of my day was filled with worry and thoughts of powdery wings and nursing home closets. Finally, I was able to get home and check every single one of my favorite sweaters for damage. I was pleasantly surprised to see that my closet is actually trimmed in cedar and so most of the sweaters that hung in there were safe and hole free. It was the sweaters that I stored downstairs, during the spring and summer months, that had been ravaged by the fluttering beasts. I was immensely saddened by what I saw. Some of these sweaters I have had for 10+ years. I just couldn't throw them away. These sweaters and I had a history. Click. That was the lightbulb going off in my head. If only I knew how to felt.

And so I asked around, took the advice I received, and did a little experimenting of my own. Here's what I found...

Step 1: Let me see if I can confuse you from the start. Some people recommended cutting out the seams before you start the felting process. I did this for some of my sweaters, but for others, I wanted to see how they would felt up before taking the shears to the sheep (pardon the pun). For now, just know that you can cut the seams out from the start, or wait and do it after they're felted.

Step 1 and 1/2: Some people also recommend only using 100% animal-fiber materials like wool and cashmere. While this is mostly true, and I too endorse this idea, I also am of the opinion that it doesn't hurt to try felting on sweaters that are mostly animal-fibers with just a little synthetic thrown in to save money on a few lamb haircuts. In my experience, some of these felted up nicely. I don't think felting is an exact science, but rather a fun experiment. Scratch that. It's not a science, but rather an art.

Step 2: Wash all the items with soap in the hot wash, cold rinse cycle. It is advised that you wash these in a mesh bag as the sweaters will throw off lots of fibers that could potentially be harmful to your washing machine.

Step 3: Dry them in the dryer.

Step 4: Evaluate your progress so far and see if you need to repeat the aforementioned processes for any of the sweaters. Again this is not an exact science. Some of my sweaters needed a second round through the washer before they were fully felted. I could tell because they didn't shrink up enough. To test some of them I did a cut test, meaning I cut into the fabric to see if it held it's shape without fraying. You can also just look very closely to see if you can still see the pattern of the knitted stitch.

Step 5: Start planning your project based on how the materials felted up. You might want to use some for applique, others for a bag, and yet others for childrens' clothing.

Step 6: Check in later and see my felt projects. Maybe they will inspire you to do the same.

LinkWithin

Related Posts with Thumbnails