Showing posts with label Applique. Show all posts

Tuesday, June 22, 2010

Before and After Pictures...

The art of making a house a home sometimes requires that things be custom made for a space. I recently picked up an old wooden cabinet that had been converted into a play stove for kids. It was still in pretty good shape but definitely needed a little TLC. Josh took off all the old hardware, gave it a good sand, painted it, and added new door handles to match our little girl's room. Finally Josh rummaged through his pile of miscellaneous junk to find the perfect oven temperature knob. Along with that, Josh also made a grocery cart. Can you see it parked next to the newly renovated stove? I think a matching fridge is in the works for Christmas. Shhh, don't tell.

Here are the before and after pictures...


To make a room stand out as being unique, and truly belonging to you, you need to find a way to customize it with things that are truly one-of-a-kind; those things can be made by your or by others.  This is the secret behind the art of making a house a home.  In my daughter's room for example, items have been made by 16 different crafters and artists...

Print by Artist Charley Harper

 
Fairy furniture by Utah Artist Debbie Schraman

Custom made changing table by Great Grandpa Korte who specializes in woodwork

Hand-knit blankets, custom made by Great Grandma Korte and Grandma Kathy

Handmade one-of-a-kind quilt, custom made by nine of my dearest Utah friends

Custom made bed-skirt, curtains, one-of-a-kind machine appliqued quilt, and baby mobile all made by me.

All these items, perfectly mixed together like a good recipe, make Monet's room a genuine masterpiece.  Not only is it aesthetically pleasing to the eye, but it's also warm to the heart because the items have been made by real people.  As Monet get's older, I'm sure the collection in her room will grow.  Like a fine wine, a house becomes a home over time.

Sunday, June 6, 2010

More Applique Quilt Patterns to Come

Here are the latest photos of one of my most recent applique quilt patterns. Both machine applique and felt applique techniques were used to make this handmade quilt.

My daughter, husband, and I were out on a picnic one day, sitting on a handmade quilt given to us from Josh's Grandma. It got me thinking, and in the sunshine, with fine food and family, an idea came to me. What if I made a literal picnic quilt. From there I designed and created this fun little masterpiece, full of bright colors and sweetness.


Josh made these matching ceramic dishes and I made matching cherry print napkins to go along with this handmade quilt.  You can buy the whole set, along with a vintage picnic basket at The Artists' House Etsy Shop.  If you rather not purchase the entire set, the quilt is also for sale on it's own.


I'm currently working on the pattern for this handmade quilt.  Soon it will be available in my Etsy shop.


Yummy, don't you think?

Tuesday, May 25, 2010

My New Series of Mixed Media Fiber Wall Art


What a cozy living room!  Don't you want to move in?  Have a seat on the comfy couch, maybe cover up with the blanket, and turn on the lamp so you can read?


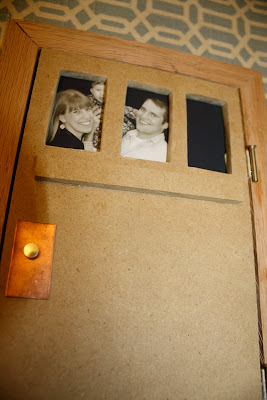
Hey look, someone is at the door.


It's the Flickers.  They've come over to say hi.


The neat thing about this new series of wall art is that the frames are open so you can switch photos in and out, as often as you please.

I'm struggling to decide on a name for my new series.  Picture n' Picture?  Frame Yourself?  Any suggestions?  

I have another three pieces already in sketch mode.  I can't wait to share them with you when I finish.  


What do you think of this funky room?


Be careful, these aren't baby proof.


Look who's on T.V.


You too could be a star!


Keep an eye on The Artists' House etsy shop, as these will be popping up for sale over the next couple days.

Wednesday, April 28, 2010

Machine Applique Tutorial - Freezer Paper Method

If you love to sew, you should know how to applique.  There are so many wonderful projects out there that ask you to "use your favorite method of applique".  Today, I'm going to share with you one method that I use.  I'm also going to link you to some other sites where additional applique projects and instructions can be found.

Applique, like many skills, takes practice and patience.  I would start by making a few simple shapes, and then progress to more difficult ones.  Buttons, rickrack, and embroidery thread are great tools in adding small details to your applique images.

And for your first project, why don't you give my Art Inspired Applique Quilt pattern a try.  
It's now available in my Etsy shop.  

(15% off if you mention that you follow this blog in the message to the seller)


Let's begin...

Today I'm going to make an appliquéd quilt block with you.

Step 1:  Find or draw a picture that you wish to recreate using applique.  Make sure you consider the size.  I often use a copier to make the image larger or smaller based on my needs.

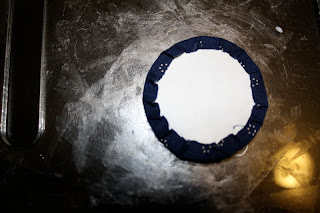
Step 2:  Trace the pieces of the picture that you need to create in applique on the glossy side of some freezer paper with a fine tip sharpie marker.  For the image I'm doing, I traced a circle for the mother's head and the body of the mother.

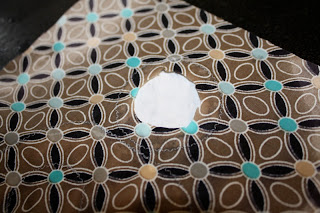
Step 3:  Cut the shapes out and iron down the glossy side of the freezer paper to the back side of the fabric.

Step 4:  Cut around the freezer paper image, leaving about 1/4 - 3/8 of an inch border of fabric.

Step 5:  Using a fabric glue stick, preferably water soluble, rub a small amount of glue around the image on both the freezer paper and the fabric border.  Fold over the fabric so that it is glued to the freezer paper and so that all your edges are no longer "raw".

Step 6:  Repeat step 5 for all your pieces.

Step 7:  This is optional... if your shape has shapes within a shape, you can simply add a piece of fabric, raw edges and all, behind the original shape to add a multi-layer affect.

Just cut around the added piece of fabric so that it's raw edges are tucked under the top layer of fabric.  I used a small bead of water soluble basting glue to adhere the two fabrics together.  Sewing pins could also work.

Lastly, I tucked the raw edge of the baby's back under with a little dot of glue.

Step 8:  Set your sewing machine to the zig zag setting, length and width set at about 1.  Bond the applique images to your fabric block with water soluble basting glue or sewing pins.

Step 9:  Carefully and slowly, sew around both the inside and the outside edges of the shape you originally made with freezer paper, knotting off the strings once you get completely around the image.  Your zig zag stitch should go inside the image, then outside, then inside, then outside, etc.

Step 10:  Once your applique pieces are securely sewn down, spray both the front and the back of the fabric block with water.  This loosens the water soluble glue so that the freezer paper can come out.  Very carefully cut the back outer fabric till you see the freezer paper.  Warning, be careful not to cut through the applique piece and stay at least a quarter inch away from the sewn seam.

Step 11:  When you're finished cutting out the back fabric, it should look something like this.  Now carefully pull the freezer paper away from the sewn seam and discard.  

You've finished the head. 

Step 12:   Now move on to the mother's body, repeating the before mentioned step and realizing that you will cut through two layers of fabric before getting to the freezer paper for the mom's body.  Be very careful NOT to cut through the baby's body.

Step 13:  Continue cutting out the back fabrics, it should look something like this.  Now carefully pull the freezer paper away from the sewn seam and discard.  Once all the freezer paper has been removed, neatly iron the seam allowance down.  Now turn it over...  


Congratulation!  You're all finished!

For more help on different methods of applique, plus additional projects, you can check out 

Please let me know if you have any questions or suggestions of better techniques.

What are you going to create?  

If you finish a project, inspired by this post, would you please leave me a comment linking to your project.  I would love to take a peak see!  

Happy sewing!

Wednesday, April 21, 2010

A Picture That Tells a Thousand Stories

When I was a little girl, my sister and I loved to dress up dolls: paper dolls, Barbie dolls, Cabbage Patch Kids.  We never really played with the dolls.  Rather, we spent countless hours dressing them, doing their hair, and creatively setting up their houses and rooms.  In hind sight, I guess I'm not surprised that I enjoyed making these projects so much.  I genuinely felt like I was seven again, dressing up dolls with my beloved big sister.  


As I created these applique images, from photographs that Josh and I have taken, I only used materials that I found in my stash.  This is my final submission to the April Stash Bust.  Materials I used consisted of freezer paper, left over applique supplies from the quilt I made Monet last year (invisible thread, basting glue, an awl, and a glue stick), embroidery thread, and scrap fabrics from my many drawers of leftovers.


While the picture below originally only reminded me of my sweet husband, running around the house with my nieces, playing with umbrellas inside; the new version's many fabrics now remind me of all the stories that each specific piece of fabric holds within its various threads.


The fabric that created the skin came from a flower I made for a friend's wedding bouquet and dress.


The umbrella's fabric was given to me by a friend when we were making Christmas cards at a ladies craft night.

The dress was leftover from when I was pregnant and making my daughter a quilt. 


The black sweater in this image came from a sweater I altered just recently.

The rug was a leftover scrap from when we upholstered our bar stools.

And so, with each new fabric, a whole new story is added to the picture, a memory is revisited.


Now these pictures don't tell just one story, or even two, but countless narratives.  Each fabric scrap is a chapter perfectly crafted together into an artwork that tells a story that is exponentially deeper.


LinkWithin

Related Posts with Thumbnails