If you love to sew, you should know how to applique. There are so many wonderful projects out there that ask you to "use your favorite method of applique". Today, I'm going to share with you one method that I use. I'm also going to link you to some other sites where additional applique projects and instructions can be found.
Applique, like many skills, takes practice and patience. I would start by making a few simple shapes, and then progress to more difficult ones. Buttons, rickrack, and embroidery thread are great tools in adding small details to your applique images.
And for your first project, why don't you give my Art Inspired Applique Quilt pattern a try.
It's now available in my Etsy shop.
(15% off if you mention that you follow this blog in the message to the seller)
Let's begin...
Today I'm going to make an appliquéd quilt block with you.
Step 1: Find or draw a picture that you wish to recreate using applique. Make sure you consider the size. I often use a copier to make the image larger or smaller based on my needs.
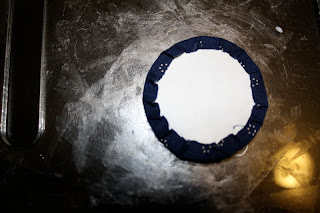
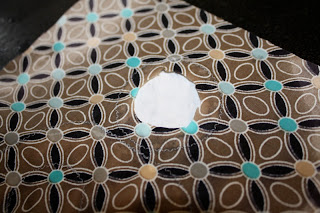
Step 2: Trace the pieces of the picture that you need to create in applique on the glossy side of some freezer paper with a fine tip sharpie marker. For the image I'm doing, I traced a circle for the mother's head and the body of the mother.
Step 3: Cut the shapes out and iron down the glossy side of the freezer paper to the back side of the fabric.
Step 4: Cut around the freezer paper image, leaving about 1/4 - 3/8 of an inch border of fabric.
Step 5: Using a fabric glue stick, preferably water soluble, rub a small amount of glue around the image on both the freezer paper and the fabric border. Fold over the fabric so that it is glued to the freezer paper and so that all your edges are no longer "raw".
Step 6: Repeat step 5 for all your pieces.
Step 7: This is optional... if your shape has shapes within a shape, you can simply add a piece of fabric, raw edges and all, behind the original shape to add a multi-layer affect.
Just cut around the added piece of fabric so that it's raw edges are tucked under the top layer of fabric. I used a small bead of water soluble basting glue to adhere the two fabrics together. Sewing pins could also work.
Lastly, I tucked the raw edge of the baby's back under with a little dot of glue.
Step 8: Set your sewing machine to the zig zag setting, length and width set at about 1. Bond the applique images to your fabric block with water soluble basting glue or sewing pins.
Step 9: Carefully and slowly, sew around both the inside and the outside edges of the shape you originally made with freezer paper, knotting off the strings once you get completely around the image. Your zig zag stitch should go inside the image, then outside, then inside, then outside, etc.
Step 10: Once your applique pieces are securely sewn down, spray both the front and the back of the fabric block with water. This loosens the water soluble glue so that the freezer paper can come out. Very carefully cut the back outer fabric till you see the freezer paper. Warning, be careful not to cut through the applique piece and stay at least a quarter inch away from the sewn seam.
Step 11: When you're finished cutting out the back fabric, it should look something like this. Now carefully pull the freezer paper away from the sewn seam and discard.
You've finished the head.
Step 12: Now move on to the mother's body, repeating the before mentioned step and realizing that you will cut through two layers of fabric before getting to the freezer paper for the mom's body. Be very careful NOT to cut through the baby's body.
Step 13: Continue cutting out the back fabrics, it should look something like this. Now carefully pull the freezer paper away from the sewn seam and discard. Once all the freezer paper has been removed, neatly iron the seam allowance down. Now turn it over...
Congratulation! You're all finished!
For more help on different methods of applique, plus additional projects, you can check out
Please let me know if you have any questions or suggestions of better techniques.
What are you going to create?
If you finish a project, inspired by this post, would you please leave me a comment linking to your project. I would love to take a peak see!
Happy sewing!


